
Welcome to our collection of milk maker recipes! If you’re the proud owner of a Chefwave Milk Maker, you know just how versatile and convenient this appliance can be. Not only can it churn out fresh, creamy milk from a variety of sources, but it can also be used to make all sorts of delicious treats, from ice cream to yogurt.
In this page, we’ll provide you with an introduction to the Chefwave Milk Maker, as well as step-by-step instructions on how to use it. We’ll also share some of our favorite recipes that make use of this amazing appliance, including recipes for almond milk, coconut milk, and more. Whether you’re a seasoned pro or a newcomer to the world of milk makers, we hope you’ll find something here to inspire and delight your taste buds.
Table of Contents
Introduction to the Chefwave Milk Maker
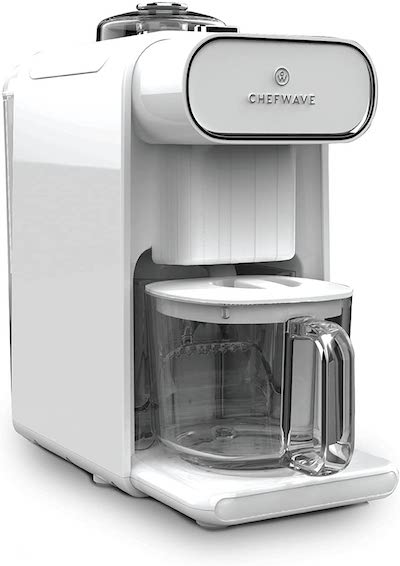
The Chefwave Milk Maker is a versatile appliance that allows you to make a variety of milk and milk-based products right in your own kitchen. Whether you’re a fan of cow’s milk, almond milk, oat milk, or something else entirely, the Milk Maker can help you churn out fresh, creamy goodness in just a few simple steps.
But the Milk Maker isn’t just for making milk – it can also be used to create a range of other dairy products, including yogurt, ice cream, and even cheese. And with its compact size and easy-to-use controls, it’s a convenient and hassle-free way to bring the joy of homemade dairy products into your home.
So whether you’re looking to save money on store-bought milk, reduce your environmental impact, or simply enjoy the taste and texture of fresh, homemade dairy products, the Chefwave Milk Maker is an excellent choice.
See also: Best Nut Milk Maker & Bost Soy Milk Maker
How to Use the Chefwave Milk Maker
- Begin by gathering all of the ingredients and equipment you’ll need for your recipe. This may include milk, cream, sugar, flavorings, and any other ingredients called for in your recipe. Make sure to have clean utensils and containers on hand as well.
- Place the milk maker’s pitcher on the base and plug it in.
- If you are using the milk maker to make milk, pour the appropriate amount of milk into the pitcher. If you are using it to make another dairy product, such as yogurt or ice cream, add the necessary ingredients to the pitcher according to your recipe.
- Close the lid of the milk maker and select the desired program on the control panel. The milk maker has several preset programs for different types of milk and dairy products, as well as a manual setting for more customized creations.
- Press the “start” button to begin the process. The milk maker will automatically heat and churn the ingredients, and will shut off when the process is complete.
- Once the process is finished, carefully remove the pitcher from the base and pour the finished product into a clean container. If you are making milk, you may need to strain it to remove any solids.
- Enjoy your freshly made milk or dairy product, or store it in the refrigerator for later use. Make sure to clean the milk maker and its components thoroughly after each use to ensure optimal performance.
With these simple steps, you’ll be well on your way to enjoying all of the delicious, homemade treats that the Chefwave Milk Maker has to offer.
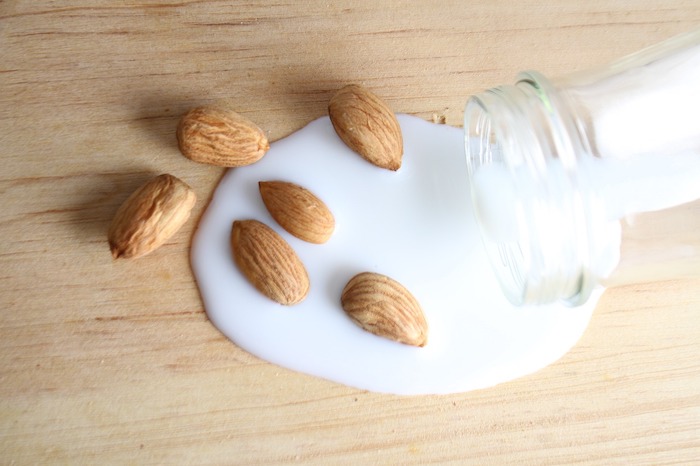
Chefwave Milk Maker Recipe: Freshly Made Almond Milk
Ingredients:
- 1 cup raw almonds
- 4 cups water
- Sweetener (optional)
Instructions:
- Soak the almonds in water overnight, or for at least 8 hours. This will help to soften the almonds and make them easier to process.
- Drain and rinse the almonds, then place them in the pitcher of the milk maker.
- Add 4 cups of water to the pitcher.
- If desired, add a sweetener such as maple syrup or honey to taste.
- Close the lid of the milk maker and select the “almond milk” program on the control panel. Alternatively, you can use the manual setting and adjust the temperature and time as needed.
- Press the “start” button to begin the process. The milk maker will heat and blend the almonds and water, then strain the mixture to produce the almond milk.
- Once the process is complete, carefully remove the pitcher from the base and pour the almond milk into a clean container.
- Enjoy your freshly made almond milk as is, or use it in your favorite recipes. You can also store it in the refrigerator for up to 3 days.
With this simple recipe, you can enjoy the creamy, nutty goodness of homemade almond milk anytime you like. And with the Chefwave Milk Maker, it’s never been easier to make your own delicious dairy products at home.
Chefwave Milk Maker Recipe: Coconut Milk Ice Cream

Ingredients:
- 2 cans full-fat coconut milk
- 1 cup heavy cream
- 1 cup sugar
- 2 tsp vanilla extract
- Pinch of salt
Instructions:
- In a large mixing bowl, combine the coconut milk, heavy cream, sugar, vanilla extract, and salt. Stir until the sugar is fully dissolved.
- Pour the mixture into the pitcher of the milk maker.
- Close the lid of the milk maker and select the “ice cream” program on the control panel. Alternatively, you can use the manual setting and adjust the temperature and time as needed.
- Press the “start” button to begin the process. The milk maker will churn and freeze the mixture until it reaches the desired consistency.
- Once the process is complete, carefully remove the pitcher from the base and scoop the ice cream into a clean container.
- Cover the container and freeze for at least 2 hours, or until the ice cream is firm.
- Serve the ice cream as is, or top with your favorite toppings such as chocolate chips, sprinkles, or chopped nuts.
Chefwave Milk Maker Recipe: Oat Milk
Ingredients:
- 1 cup rolled oats
- 4 cups water
- Sweetener (optional)
Instructions:
- Soak the oats in water overnight, or for at least 8 hours. This will help to soften the oats and make them easier to process.
- Drain and rinse the oats, then place them in the pitcher of the milk maker.
- Add 4 cups of water to the pitcher.
- If desired, add a sweetener such as maple syrup or honey to taste.
- Close the lid of the milk maker and select the “oat milk” program on the control panel. Alternatively, you can use the manual setting and adjust the temperature and time as needed.
- Press the “start” button to begin the process. The milk maker will blend and strain the oats and water to produce the oat milk.
- Once the process is complete, carefully remove the pitcher from the base and pour the oat milk into a clean container.
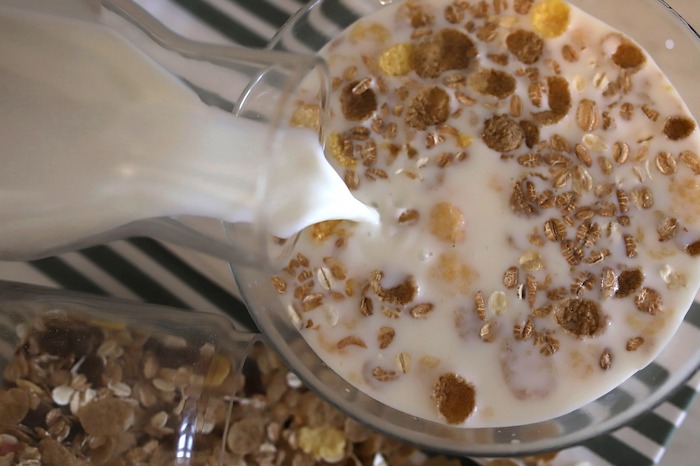
- Enjoy your freshly made oat milk as is, or use it in your favorite recipes. You can also store it in the refrigerator for up to 3 days.
Chefwave Milk Maker Recipe: Vanilla Yogurt
Ingredients:
- 4 cups milk (cow’s milk, almond milk, or another type of milk)
- 2 tbsp plain yogurt (with live cultures)
- 1 tsp vanilla extract
Instructions:
- Place the milk in the pitcher of the milk maker.
- Add the plain yogurt and vanilla extract to the pitcher.
- Close the lid of the milk maker and select the “yogurt” program on the control panel. Alternatively, you can use the manual setting and adjust the temperature and time as needed.
- Press the “start” button to begin the process. The milk maker will heat and ferment the mixture to produce the yogurt.
- Once the process is complete, carefully remove the pitcher from the base and pour the yogurt into a clean container.
- Refrigerate the yogurt until chilled.
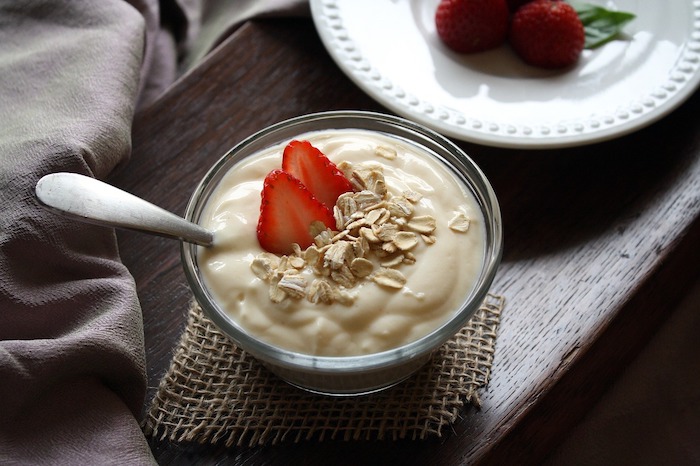
- Serve the yogurt as is, or top with your favorite toppings such as fruit, granola, or nuts.
With this simple recipe, you can enjoy the creamy, tangy goodness of homemade vanilla yogurt anytime you like. And with the Chefwave Milk Maker, it’s never been easier to make your own delicious dairy products at home.

Hi, I’m Jen from New Mexico. I have been working from home as a graphic designer for a long time. While working at home, I realized that I enjoy spending time in the kitchen. The kitchen is my biggest hobby. I set up this site to relay the products and experiences I’ve tried. I review many kitchen equipment and share them with you!